Step 1. Make sure your Windows operating system edition has RDP server functionality
Step 2. Open Control Pane
Windows 8
Press Win+X, this opens a menu, select Control Panel in the menu.
Windows 7 and Windows Vista
Click Start button > Control Panel.
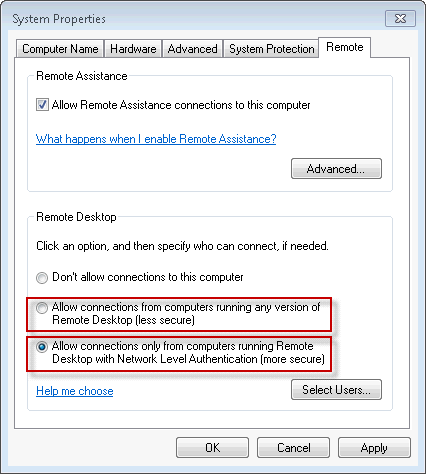
Step 3. Enable Remote Desktop
In Control Panel click System and Security > System, in the left pane, click Remote Settings.
The Xtralogic RDC supports Network Level Authentication (NLA), so you can choose the “Allow connections only from computers running Remote Desktop with Network Level Authentication (more secure)” option.
Alternatively, if you plan to access this computer with legacy RDP clients without NLA support, you can select the other less secure allow option.
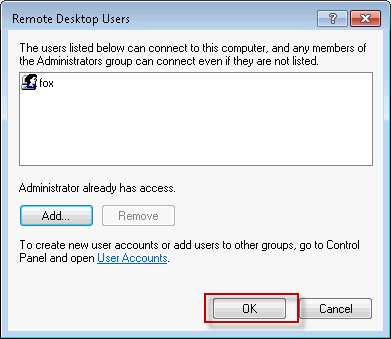
Step 4. Grant the user account remote access
A user account that will be used to connect to Remote Desktop has to be allowed to do that. If the user account is a member of the Administrators group it is already allowed to connect and you can skip this step, otherwise click Select Users and click Add button.
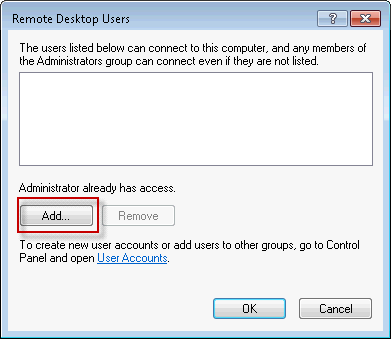
Enter a user name and click OK button.

Click OK button.
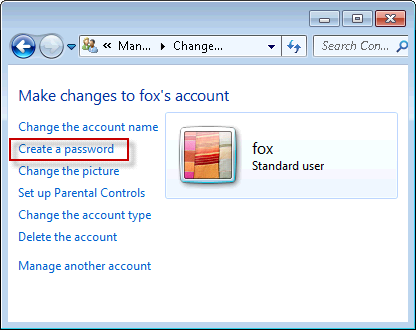
Step 5. Make sure the account is password protected
The user account has to be password protected in order to be able to access Remote Desktop. To verify, in Control Panel go to User Accounts and Family Safety > User Accounts
Windows 8
Make sure there is Password protected label next to the account icon. If the account is not password protected, go to Manage another account, click on the account, go to Create a password.
Windows 7 and Windows Vista
Go to Add or remove user accounts.
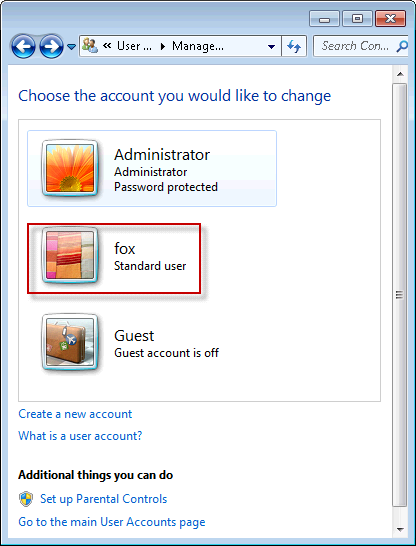
Click on the user name. If you see Create Password in the options list, it means that the account does not have a password. Click Create Password and follow instruction to create a password.